Flash Bee: Designing a Round-Display Dashboard in Lopaka
The device
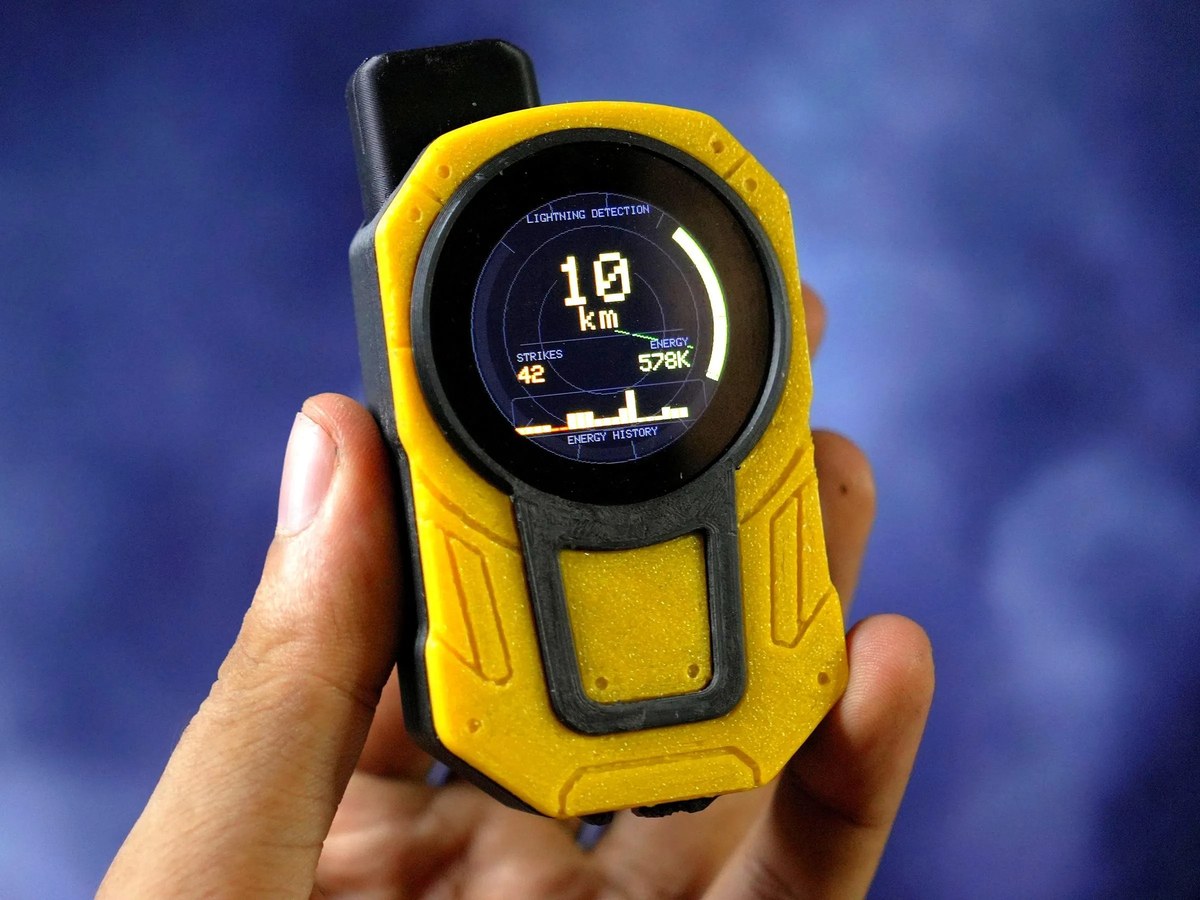
We came across gokux's Flash Bee and had to stop and stare at the screen. It's a handheld lightning detector, a pocket storm radar in a chunky yellow 3D-printed case. Clip it to your pack on a hike and it listens for the electromagnetic crackle that lightning throws off, up to 40 km away, then tells you how far the strikes are and whether the storm is closing in or backing off. No internet, no weather app, just the sky read straight off the air.
Under the hood it's a Seeed Studio XIAO ESP32-C3 reading an AS3935 lightning sensor, with a round color display up front. It catches both cloud-to-ground and intra-cloud strikes, counts them, reads how strong each one was, and keeps a running history. The part we want to talk about is that screen.
The screen
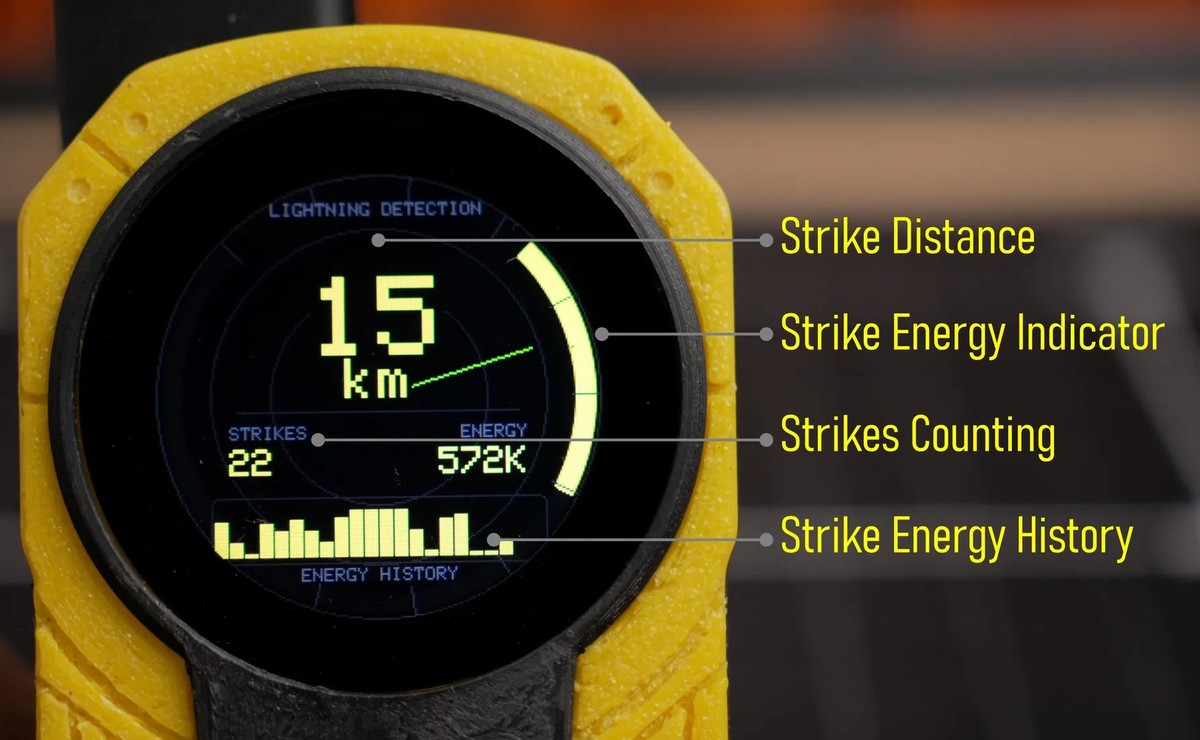
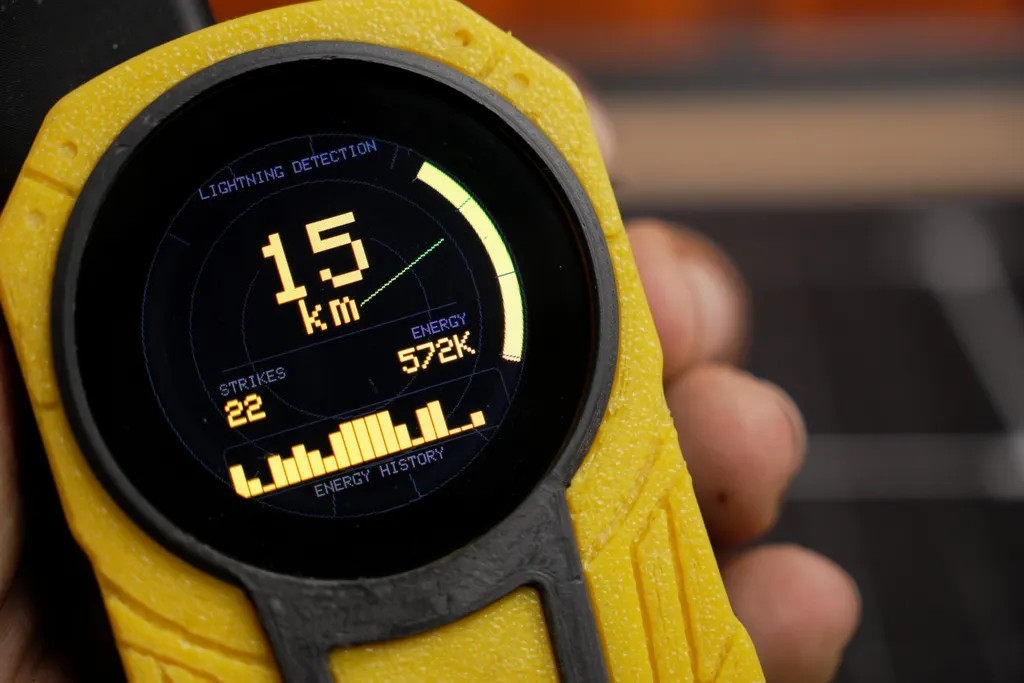
The display is a round GC9A01 panel: 240x240 pixels, full color, the Round Display for Seeed Studio XIAO. Round screens are their own design puzzle. There are no corners to tuck things into, so the whole layout has to organize itself around the center, and Flash Bee nails the look with an instrument-cluster vibe:
- Strike distance. The hero value, dead center, big and bold: kilometers to the nearest strike.
- Strike energy indicator. A bright arc hugging the right rim that fills with the strength of the last strike.
- Strikes and energy. Two readouts on a baseline below the center, a strike counter and an energy figure.
- Energy history. A little bar ticker along the bottom showing the last handful of strikes.
A faint radar sweep and guide rings sit behind it all, which is what sells the "scanning the storm" feeling.
Designing it in Lopaka
The whole screen was put together in Lopaka, and a round dashboard is a great showcase for it. Here's how the layout comes together:
- New project. Open lopaka.app, start a project, choose TFT_eSPI as the library and 240 x 240 for the round display.
- Center the hero. Drop a large text label in the middle for the distance, with a smaller "km" beneath it. That number changes constantly, so make it a variable using the make-variable button in the inspector.
- Frame the readouts. Add two small section labels, STRIKES and ENERGY, each with a variable value below it. A thin baseline between them and the center keeps things tidy.
- Add the rings. Draw a couple of concentric circles as faint guide rings to anchor the round composition.
- Leave room for the live bits. The energy arc, the radar sweep, and the history bars are animated from sensor data, so those get driven in code on top of the layout. Lopaka owns the fixed frame: labels, rings, positions, and the values you marked as variables.
Everything is placed against the center, which is the whole trick with round screens, and Lopaka shows you the circular bounds as you work so nothing important slips under the bezel.
The code
On export, Lopaka turns the layout into TFT_eSPI draw calls and hands every variable back for your firmware to set. A center readout like this comes out roughly like:
tft.setTextDatum(MC_DATUM);
tft.setTextColor(TFT_YELLOW, TFT_BLACK);
tft.setTextSize(6);
tft.drawString(distance, 120, 90);    // variable: km to nearest strike
tft.setTextSize(3);
tft.drawString("km", 120, 122);

tft.setTextDatum(ML_DATUM);
tft.setTextSize(2);
tft.drawString("STRIKES", 40, 150);
tft.drawString(strikeCount, 40, 168); // variable
Feed it live values each frame, push to the panel, and the layout you arranged in the browser is what shows up on the round display.
Wear it
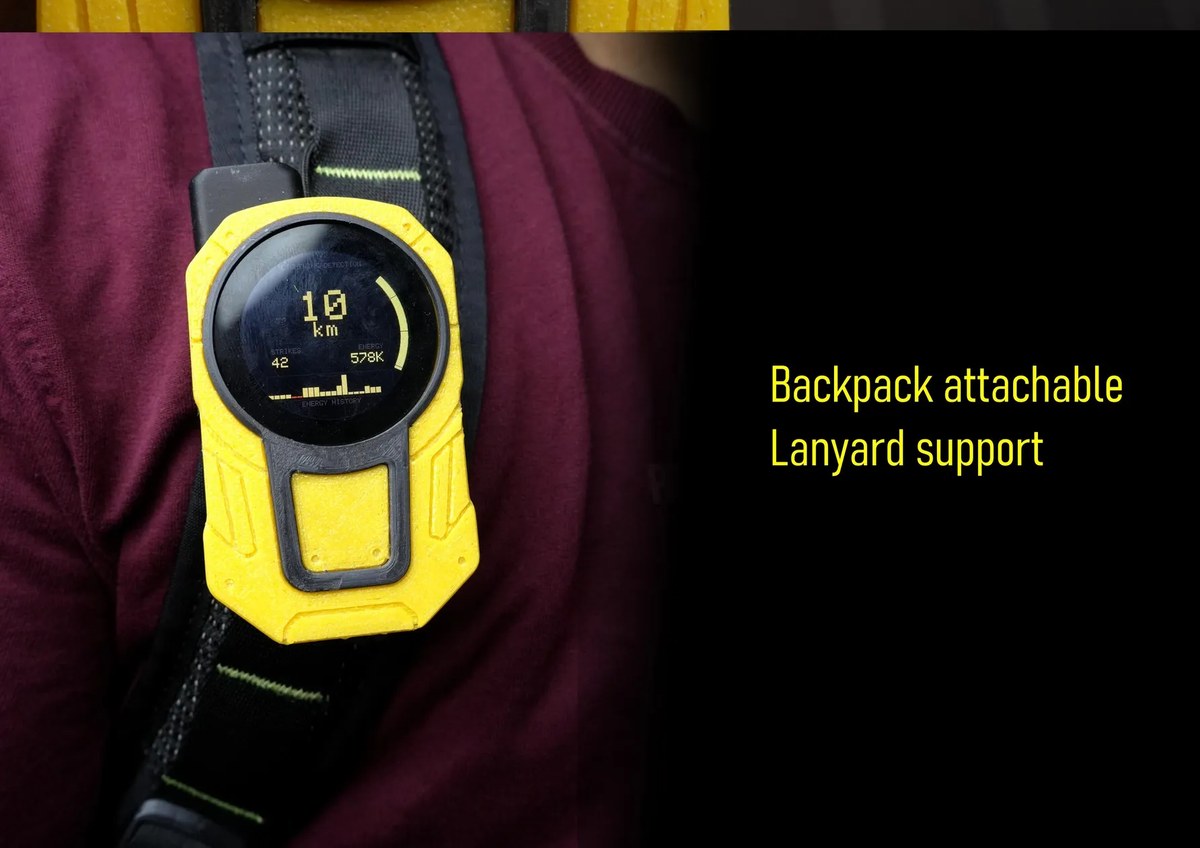
The whole thing lives in a rugged 3D-printed case with a lanyard loop and a clip, so it rides on a backpack strap where you can glance at it. A real, finished build, not a breadboard.
Try it
Want your own round dashboard? Open lopaka.app, start a TFT_eSPI project at 240 x 240, and design straight onto a circular canvas. It's free and runs in your browser. Lopaka's icon library and animations are handy for this kind of instrument look, and the gallery is full of screens to fork once you sign up.
Credits
Flash Bee by gokux, full build with parts and code on Instructables. Built on a XIAO ESP32-C3 with an AS3935 sensor and a round GC9A01 display.