
TempSense: Designing an ESP32 OLED UI for Work on the Power Grid
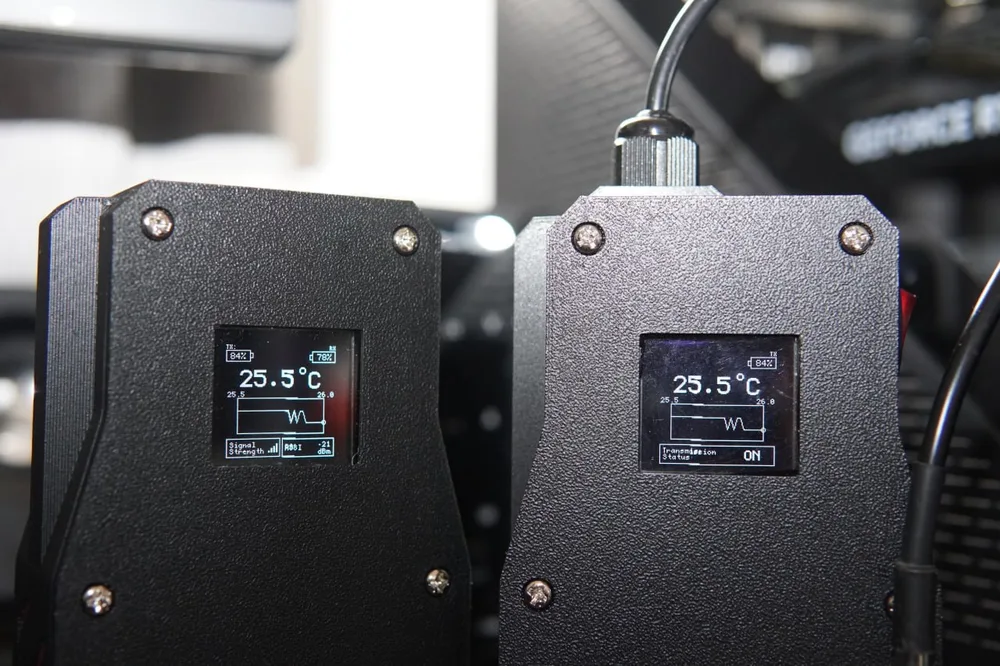
Picture the old way. Linemen sit at the top of a transmission tower, an engineer stands on the ground, and between them hangs a conductor with a barbecue temperature probe clipped to it. The engineer needs that conductor's temperature to calculate how far the line sags toward the ground. So he keys the walkie-talkie, a lineman squints at the probe, reads back "16 Celsius," and the calculation begins. By the time it finishes, the conductor is at 20, and the whole dance starts over.
Vinod looked at that and thought he could do better. He was right.
Meet Vinod
Vinod is a graduate engineer at Transpower, the company that owns and runs New Zealand's national transmission grid. He studied mechatronics, so he had spent years messing around with microcontrollers and Python, but he had never shipped a real embedded device for industry. When his team kept fighting the barbecue-probe routine during line-sagging operations, he pitched his manager on building something better. Then he built the whole thing himself: the electronics, the firmware, and the CAD for the enclosure.
The problem: a temperature you can trust, at a glance
Line-sagging work depends on the conductor's temperature. Get it wrong and the clearance math is wrong. The manual method was slow and drifted while the crew worked, so Vinod wanted a device that read the conductor directly and put the number on a screen both the crew and the engineer could see in real time.
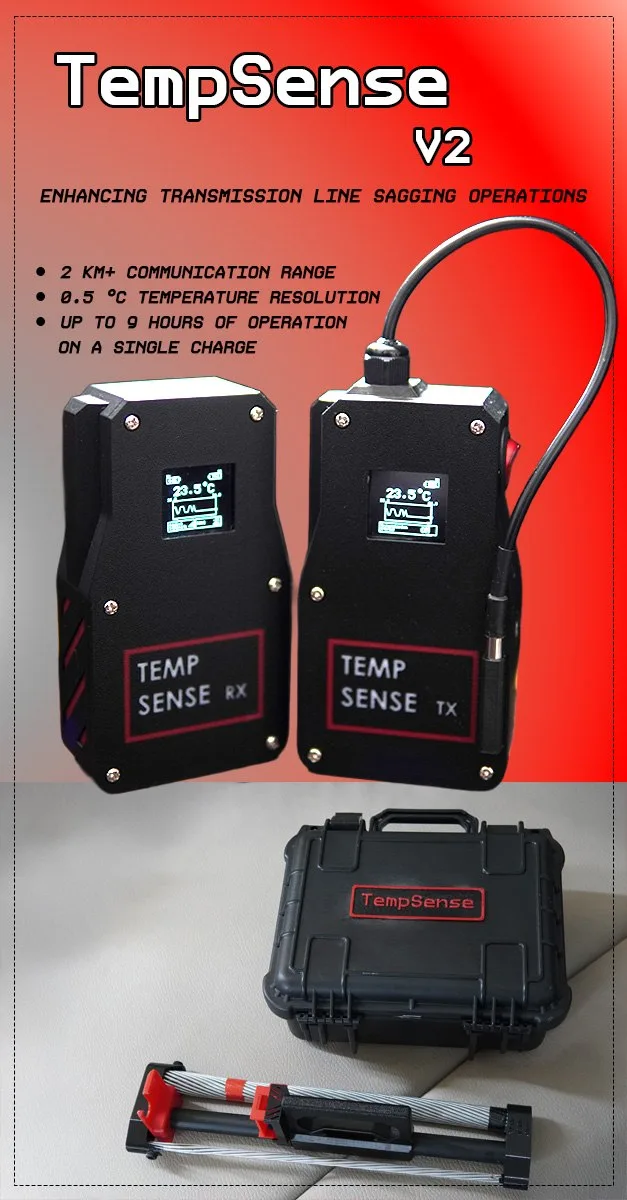
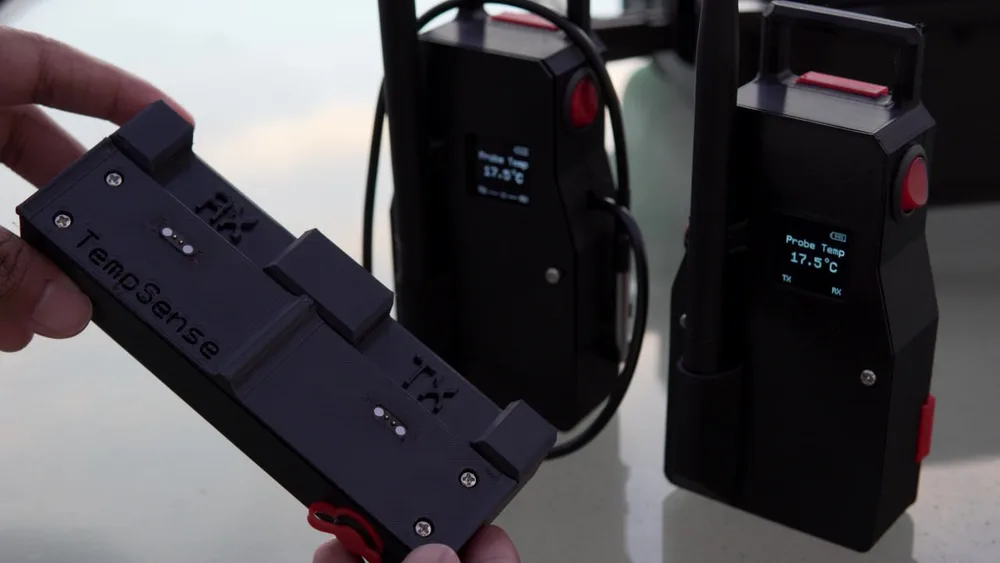
He wanted an OLED display for it. Black pixels on OLED are properly black, so the contrast holds up outside in daylight and looks sharp indoors. The device pairs a probe unit with a receiver over a LoRa link that reaches more than two kilometers, resolves temperature to 0.5°C, and runs up to nine hours on a charge. He nicknamed the first build "10 cents." The team knows it as TempSense.
Where Lopaka came in
The screen was the part Vinod used to dread. Before Lopaka, designing an OLED UI meant opening Photoshop, drawing a rectangle at the right pixel size, dragging it around to find coordinates, then copying those numbers by hand into U8g2 code in the Arduino sketch. Flash, look, nudge, repeat. He described it as so much friction that he avoided doing anything fancy with displays at all.
Lopaka removed that step. He laid out the TempSense screens visually, placed his rectangles and text where he wanted them, and brought in his own logos, which Lopaka converted into display-ready bitmaps. He picked U8g2 as the library so the exported code dropped straight into his firmware. The staged boot sequence, where the logo and readings appear in turn, came from small delays he added in code on top of a layout he could actually see while he designed it.
His summary of Lopaka to a fellow engineer: a web tool with a nice GUI where you place shapes and bitmaps, bring your own image, and it converts everything to match your display, then you take the code to your project and wire it up.
How it came together
The first iteration took Vinod about a month, CAD and 3D printing included. It was rough, and it worked. The full build ran to roughly six months, and TempSense is now on its second version, with the two units linking in real time across that two-kilometer LoRa range. He even designed a printed clamp that seats the probe on the conductor bundle, stamped "This side down" so nobody mounts it backward.
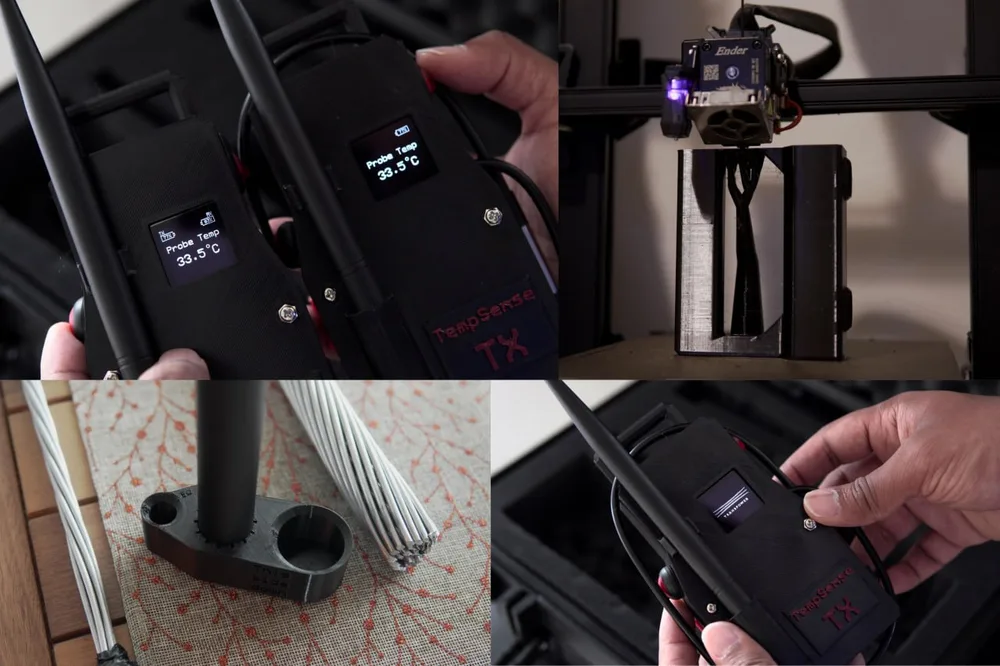
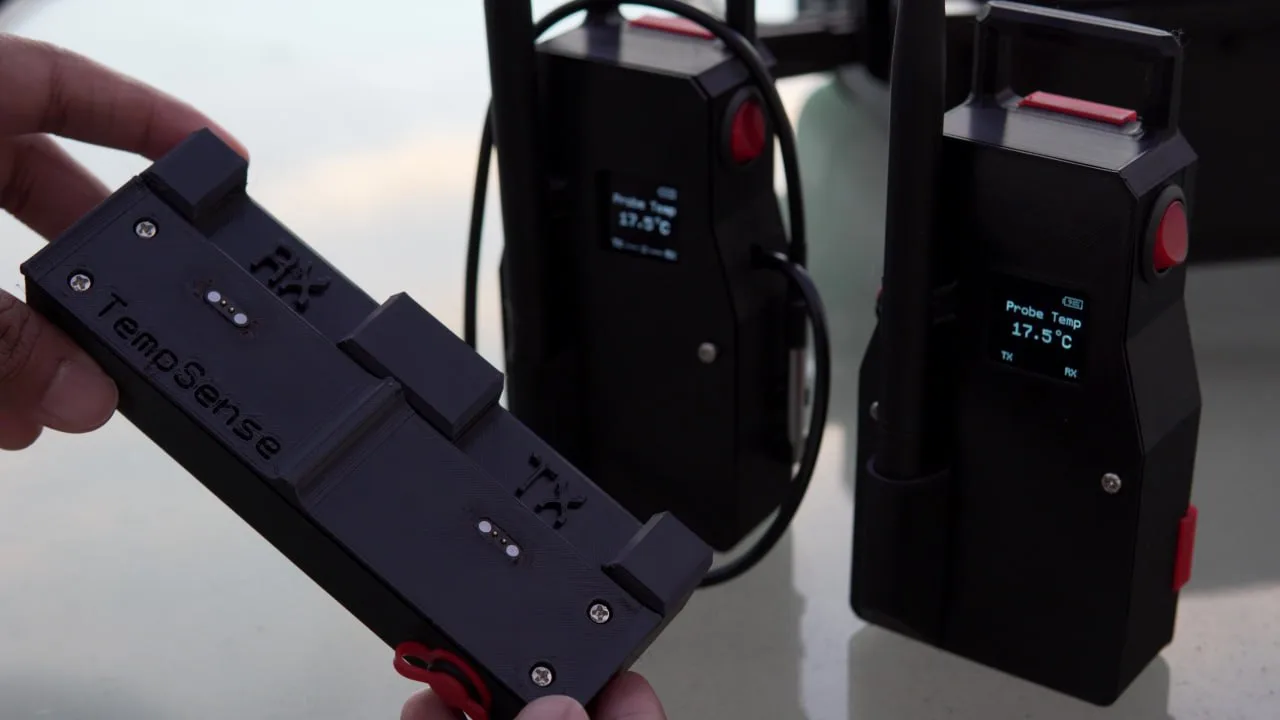
The TX and RX modules pair over that LoRa link through matching pogo-pin connectors, labeled right on the printed case so there is no guessing which unit goes where in the field.
The payoff
TempSense won Vinod the People's Choice Award at APEX25, the Annual Power Engineering Exchange. Inside Transpower and out at service provider Northpower, where he tested the prototypes on site, there is real interest in turning it into a product other providers could use instead of the probe-and-walkie-talkie routine.
Lopaka stayed in his kit after the project shipped. He reaches for it whenever an OLED display shows up in a build, around five projects a year, and rates losing it an 8 out of 10 for the pain it would cause his OLED work. He pays for Plus for the unlimited screens, and because he could see it was built by someone who cares about the tool.
Build your own
If your next project has a small screen on it, you do not have to hand-place pixels the way Vinod used to. Design the screen in the browser, pick your library, and copy the code. For monochrome panels, start with the U8g2 image converter. Moving to a color display like the inexpensive ESP32 modules Vinod has been testing? See what Lopaka supports for LVGL and other color display libraries in the same editor.
Nice work, Vinod. Go sell a thousand of them.
FAQ
How do I design an OLED UI for ESP32?
Lay the screen out visually in Lopaka, place your text, shapes, and bitmaps on a 1:1 canvas, choose U8g2 as your library, and copy the generated code into your Arduino or PlatformIO project. No hand-counting pixel coordinates.
How do I convert an image to a U8g2 bitmap?
Drop your logo or icon onto the canvas, tune the monochrome threshold, and export the U8g2 bitmap with its draw call. Vinod brought his own logos in this way for TempSense.
Can I design a monochrome OLED screen without hand-coding it?
Yes. The editor generates the layout code for you, so you write your data logic and event handling, not the pixel positions for every rectangle and label.
Does Lopaka work for SSD1306 and other OLED drivers?
Pick your panel size and U8g2 handles common OLED drivers like SSD1306 and SH1106, with the exported bitmap and draw code matching the display. You still choose the U8g2 constructor for your controller, interface, and pins.
Credits
TempSense and photography by Vinod Rodrigo.